How to Share a file in SharePoint with Specific People
How to Share a file in SharePoint with Specific People
This Guide will explain how to Share documents with people outside of your direct SharePoint group.
- Identify what you want to Share. If you have multiple files that you want to share, we encourage putting all of those files in one Folder and then Sharing out the Folder with those who need access.
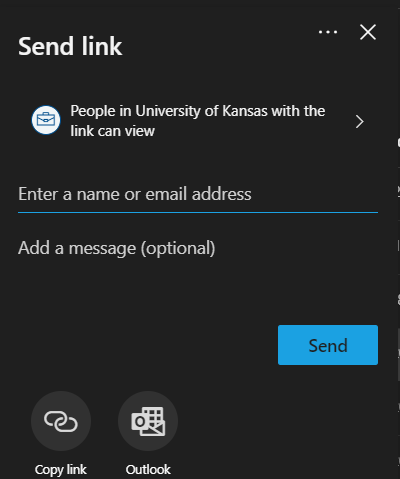
- Once you have identified the files that you want to share, right click on the document or folder and then click share. A send link dialog box should appear.
-
You will see now drop down where it says People in University of Kansas with the link can view. You can choose to keep this or you can click on the drop down and choose between Anyone with the link, People In KU with the link, People with Existing Access or Specific People. CPPR IT encourages choosing Specific People.
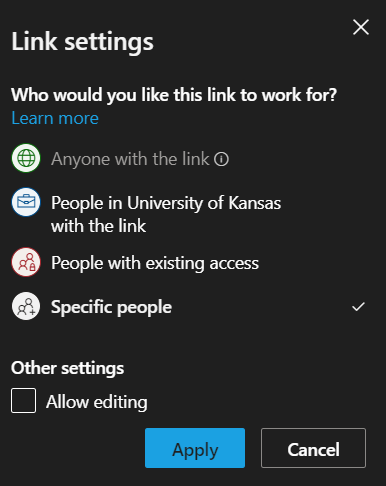
NOTE: If you want people to edit you will need to check the box at the bottom of the dialog box. If you want people to view and make comments only, keep Allow Editing unchecked.
-
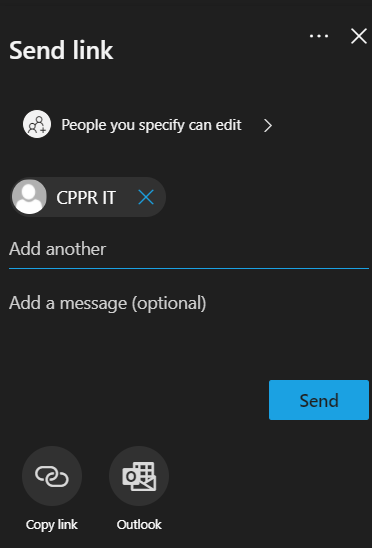
Once you have decided if you want to allow editing or not, click Apply. Now enter the name(s)/email(s) of those you are working with. Now you can copy a link to paste into MS Teams, Skype or email. You can choose to send the file direct from this page via the send button or you can also Launch outlook direct from here as well by clicking the Outlook button.
That is how you Share a file or folder with other people outside of your SharePoint Group.
NOTE; if you have a long term project with a group that needs consistent constant access to files, a Microsoft Teams group may be warranted. Contact CPPR IT for consultation on the best way on how to move forward.
If you have any issues sharing files, please reach out to CPPR IT at cppr_support@ku.edu